This post is talking about how to setup a basic developing environment of Google’s TensorFlow on Windows 10 and apply the awesome application called “Image style transfer”, which is using the convolutional neural networks to create artistic images based on the content image and style image provided by the users.
The early research paper is “A Neural Algorithm of Artistic Style” by Leon A. Gatys, Alexander S. Ecker, and Matthias Bethge on arXiv. You could also try their website application on DeepArt where there are a lot of amazing images uploaded by the people all over the world. DeepArt has apps on Google Play and App Store, but I suggest you use a much faster app Prisma, which is as awesome as DeepArt! [More to read: Why-does-the-Prisma-app-run-so-fast].
Moreover, I strongly recommend the formal paper Image Style Transfer Using Convolutional Neural Networks by the same authors published on CVPR-2016. This paper gives more details about how this method works. In short, the following two figures cover the idea behind the magic.
The following contents and Images are from the original paper. They present all the key points of the research paper.

Image representations in a Convolutional Neural Network (CNN). A given input image is represented as a set of filtered images at each processing stage in the CNN. While the number of different filters increases along the processing hierarchy, the size of the filtered images is reduced by some downsampling mechanism (e.g. max-pooling) leading to a decrease in the total number of units per layer of the network.
Content Reconstructions. We can visualize the information at different processing stages in the CNN by reconstructing the input image from only knowing the network’s responses in a particular layer. We reconstruct the input image from layers ‘conv1 2’ (a), ‘conv2 2’ (b), ‘conv3 2’ (c), ‘conv4 2’ (d) and ‘conv5 2’ (e) of the original VGG-Network. We find that reconstruction from lower layers is almost perfect (a–c). In higher layers of the network, detailed pixel information is lost while the high-level content of the image is preserved (d,e).
Style Reconstructions. On top of the original CNN activations, we use a feature space that captures the texture information of an input image. The style representation computes correlations between the different features in different layers of the CNN. We reconstruct the style of the input image from a style representation built on different subsets of CNN layers ( ‘conv1 1’ (a), ‘conv1 1’ and ‘conv2 1’ (b), ‘conv1 1’, ‘conv2 1’ and ‘conv3 1’ (c), ‘conv1 1’, ‘conv2 1’, ‘conv3 1’ and ‘conv4 1’ (d), ‘conv1 1’, ‘conv2 1’, ‘conv3 1’, ‘conv4 1’ and ‘conv5 1’ (e). This creates images that match the style of a given image on an increasing scale while discarding information of the global arrangement of the scene.

Style transfer algorithm. First content and style features are extracted and stored. The style image a is passed through the network and its style representation AL on all layers included are computed and stored (left). The content image p is passed through the network and the content representation PL in one layer is stored (right). Then a random white noise image x is passed through the network and its style features GL and content features FL are computed. On each layer included in the style representation, the element-wise mean squared difference between GL and Al is computed to give the style loss L_style (left). Also, the mean squared difference between Fl and Pl is computed to give the content loss L_content (right).
The total loss L_total is then a linear combination of the content and the style loss. Its derivative with respect to the pixel values can be computed using error back-propagation (middle). This gradient is used to iteratively update the image x until it simultaneously matches the style features of the style image a and the content features of the content image p (middle, bottom).
For example:
Now let us begin to set up the Tensorflow on windows. The website has already given all the details on the installations on different platforms. The followng part is what I did on my PC.
A. Setup the environment
1. Install Anaconda Python 3.6 Version. You may wonder why not Python 2.6, I mean based on the developing trend, I do not suggest holding on an old version of Python. Besides, right now the TensorFlow only supports 3.5.x of Python on Windows, we still need to setup a virtual environment for Tensorflow. I guess it will support 3.6.x in the near future but not 2.7.x, so you should prepare for that.
2.Open the “Anaconda Prompt” from your start menu and create a conda environment named tensorflow by the following command:
C:> conda create -n tensorflow python=3.5
Please find all the conda command in this cheat sheet.
- Activate the conda environment by issuing the following command:
C:> activate tensorflow
 (tensorflow)C:>  # Your prompt should change
4. Issue the appropriate command to install TensorFlow inside your conda environment. To install the CPU-only version of TensorFlow, enter the following command:
(tensorflow)C:> pip install --ignore-installed --upgrade https://storage.googleapis.com/tensorflow/windows/cpu/tensorflow-1.2.0-cp35-cp35m-win_amd64.whl
OK, that is it.
B. Downloading and Preparations
Now, we need to download an open source project from the Github: neural-style and extract it on your computer. According to the ‘requirements.txt‘ file, we know we need to install the following packages:
- numpy
- pillow
- scipy
- tensorflow-gpu (we did not install the gup version in case you do not have a NVIDIA GPU)
You can check the packages and versions installed in the active environment by the command:
(tensorflow)C:> conda list
Then, you can install the missing package, for example, if I want to install pillow, input
(tensorflow)C:> conda install pillow
Besides, you can use ‘pip‘ to install all the packages.
Now, download the pre-trained VGG network model and put it into the same folder with your project. You do not want to train the model by yourself it is an expensive cost of your time and power. For your information, this is a 550 MB Matlab ‘.mat’ file containing all the parameters of the model 😦 . Yes, recall the no free lunch theorem in Machine Learning.
C. Start the Image Style Transfer
The executing command is simple, direct to your folder and run the command:
(tensorflow)C:\Users\Documents\neural-style-master> python neural_style.py --content <content file> --styles <style file>--output <output file>
For example, if we put two images ‘content.jpg‘ and ‘style.jpg‘ in the current folder, and hope to get an output image ‘result.jpg‘. The command becomes:
python neural_style.py –content content.jpg –styles style.jpg –output result.jpg
After the default 1000 iteration, we may get the following results. (You could change this at line 26 of neural_style.py to speed up the process) .
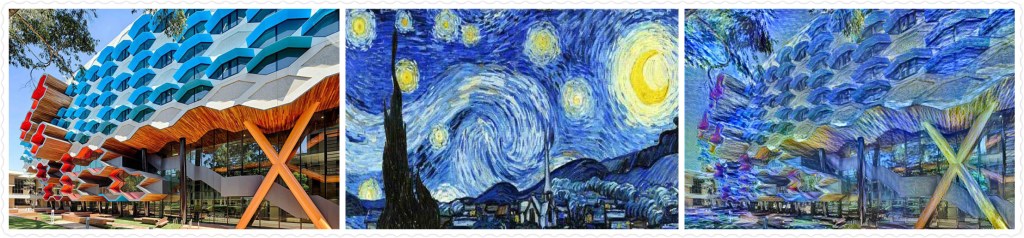
If everything goes well, let’s test the system.
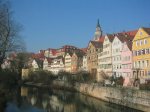
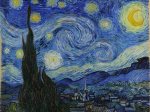
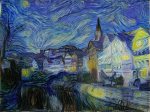
The following image is the LIMS building of the La Trobe University, Melbourne. I choose it as an example because I literally walk past it every day :). I choose the same style image as the paper, Vincent Van Gogh’s Starry Night. The third image is the resulting image. It is clear to see it combines all the features from the first two images.


The code mainly includes three files:
- neural_style.py
- stylize.py
- vgg.py
I will explain the codes in the later posts if I have enough time. In the end, as always, stay awesome!
PS:It is running!


Encourage the Author to create more useful and interesting articles.
All the money will be donated to the Standford Rural Area Education Program (reap.fsi.stanford.edu).
A$2.00


Leave a comment