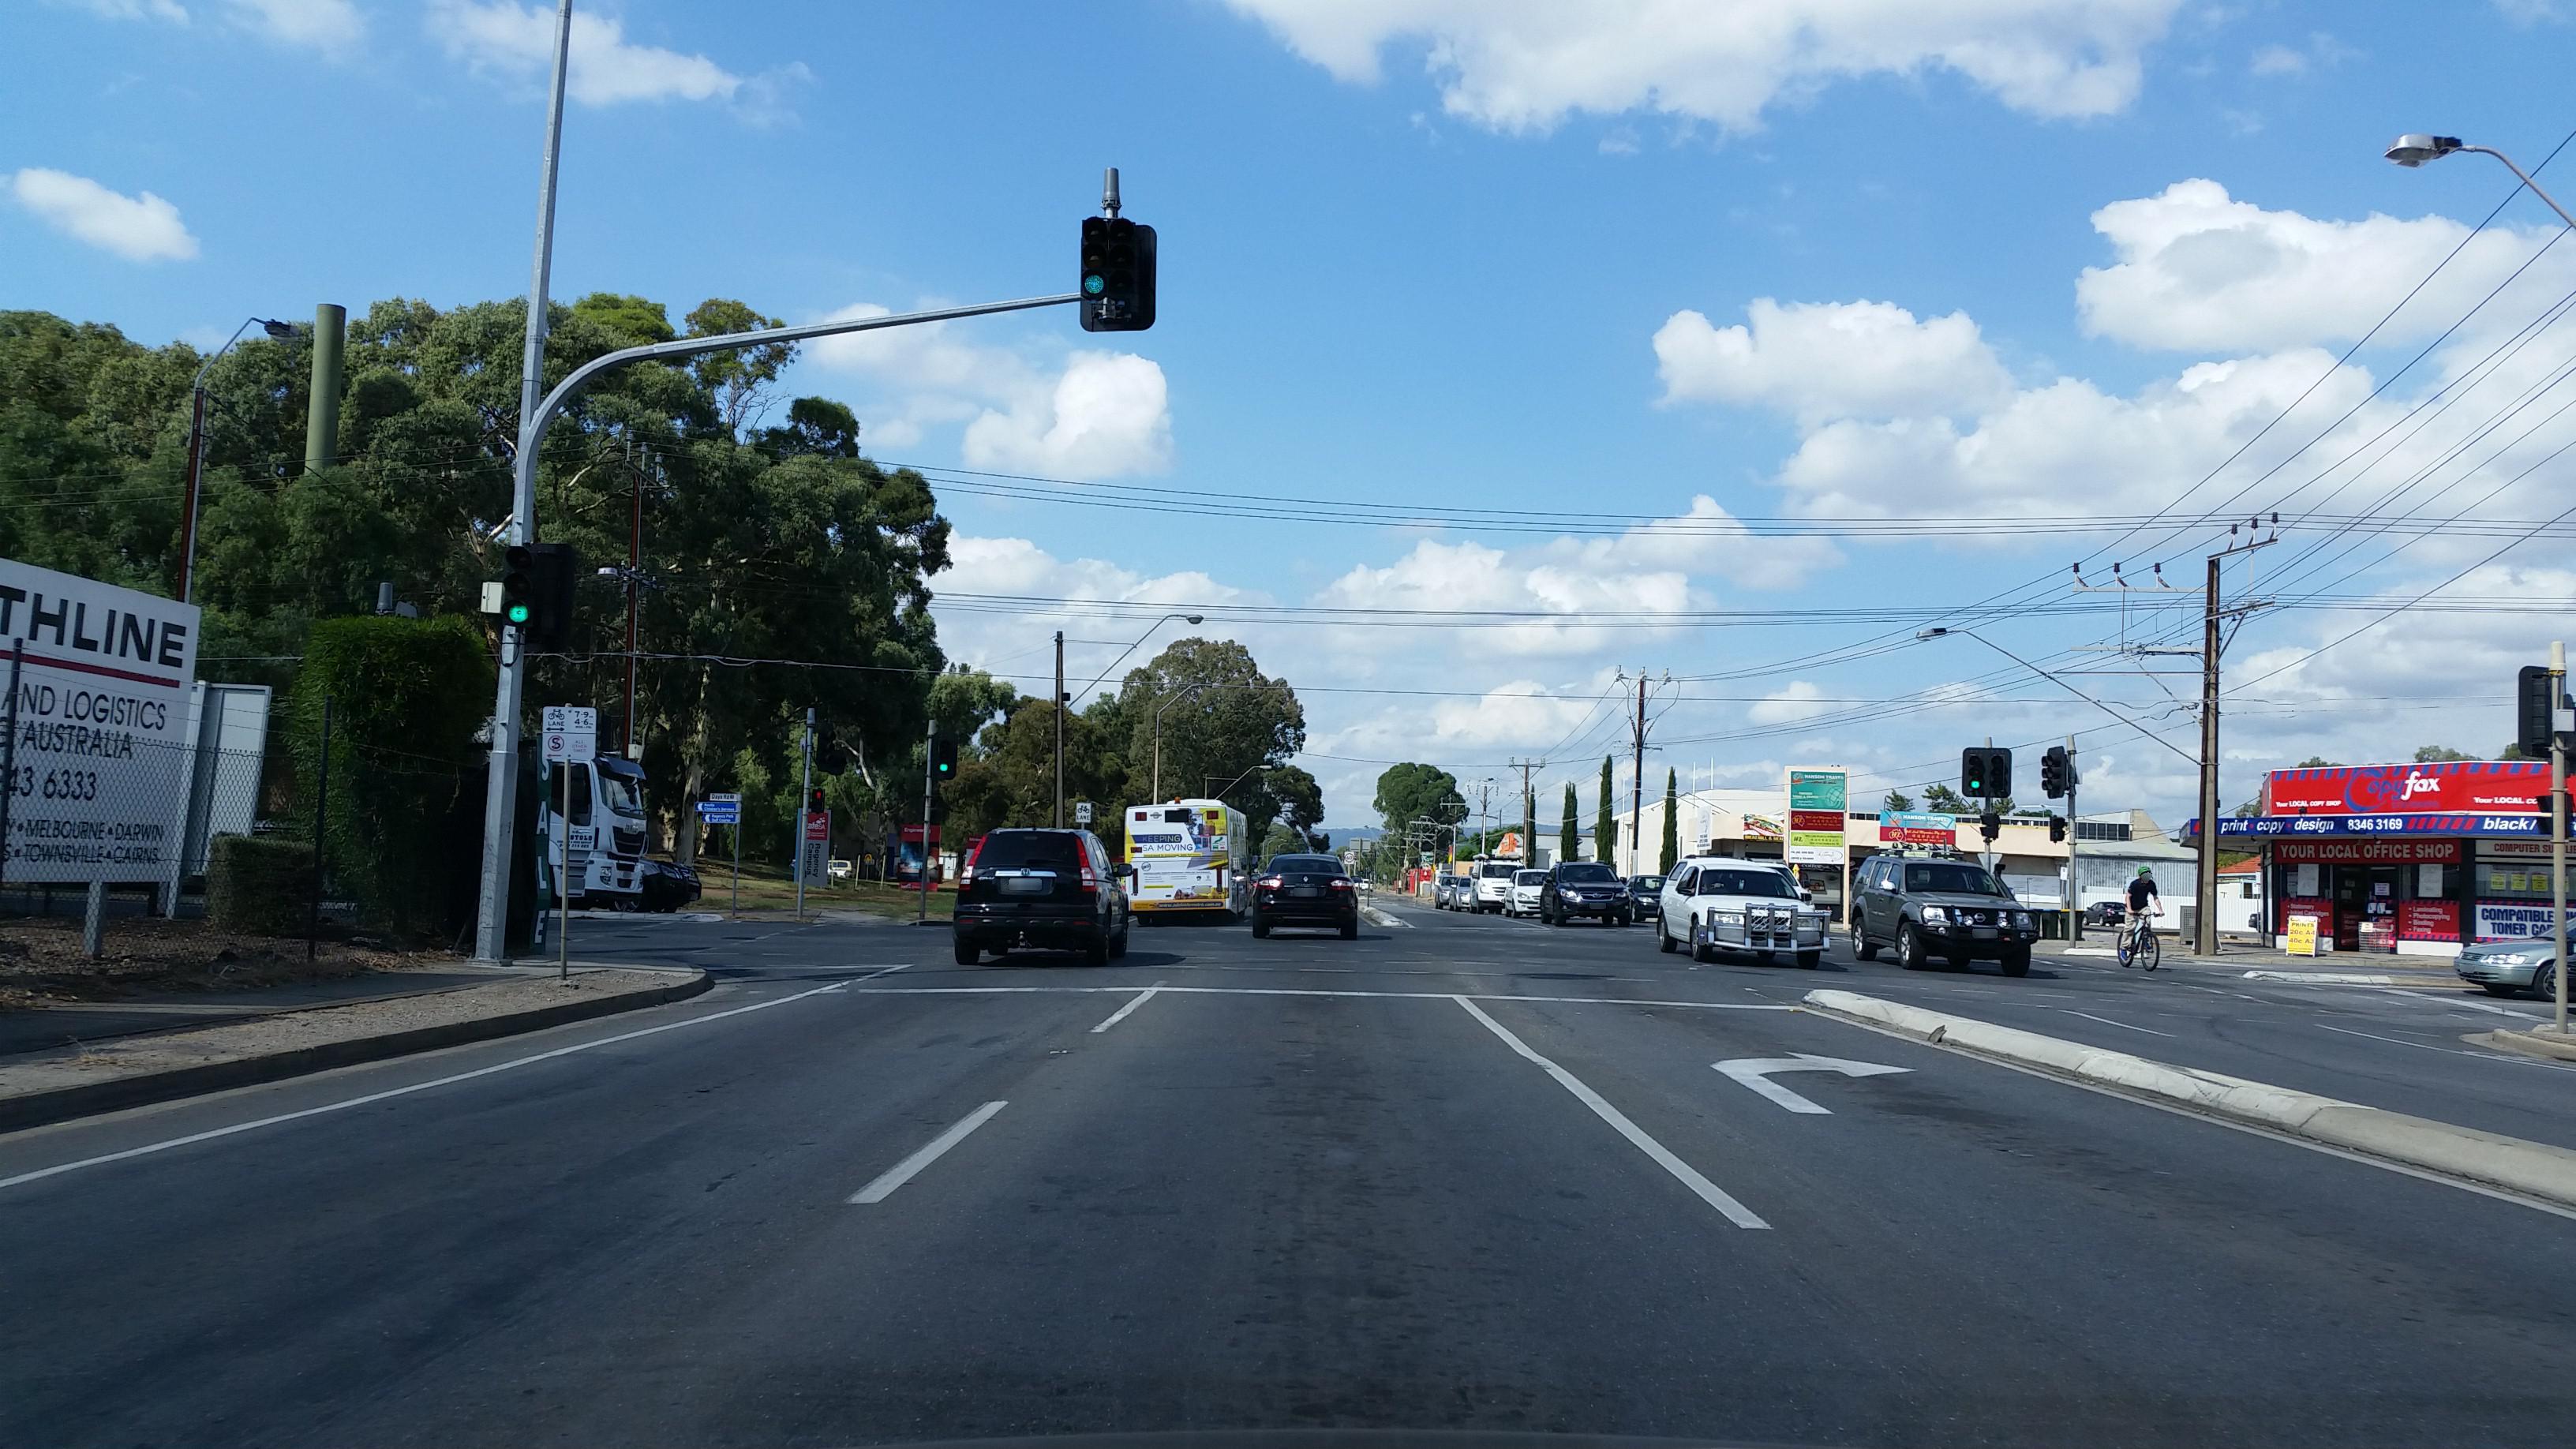
In this post, I would like to share my practice with Facebook’s new Detectron2 package on macOS without GPU support for street view panoptic segmentation. If you want to create the following video by yourself, this post is all you need. This demo video clip is from my car’s dashcam footages from Preston, Melbourne. I used the PyTorch and Detectron2 to create this video with segmentation masks.
Background Knowledge
The Panoptic Segmentation Task is designed to push the state of the art in scene segmentation. Panoptic segmentation addresses both stuff and thing classes, unifying the typically distinct semantic and instance segmentation tasks. The aim is to generate coherent scene segmentations that are rich and complete, an important step toward real-world vision systems such as in autonomous driving or augmented reality.
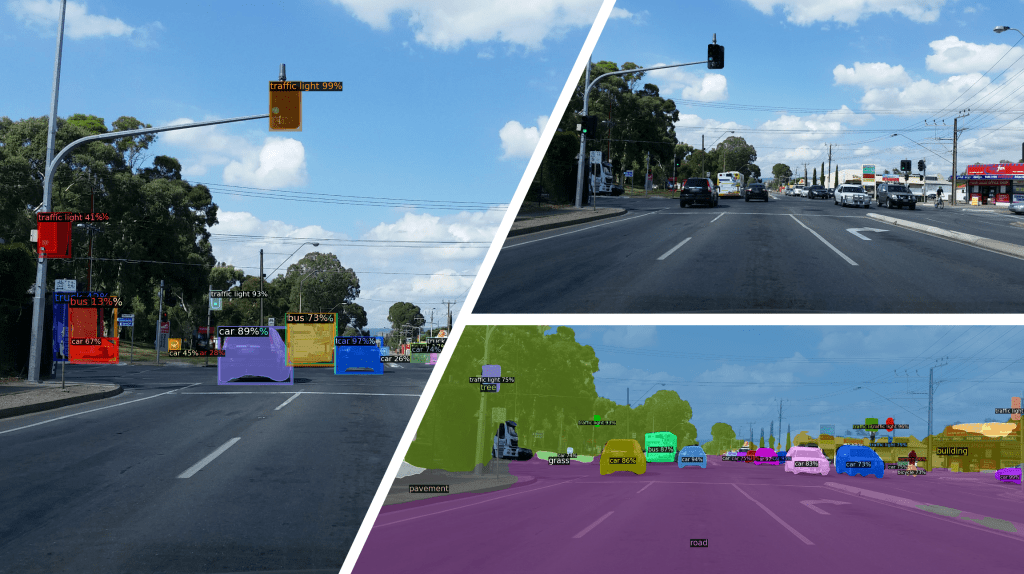
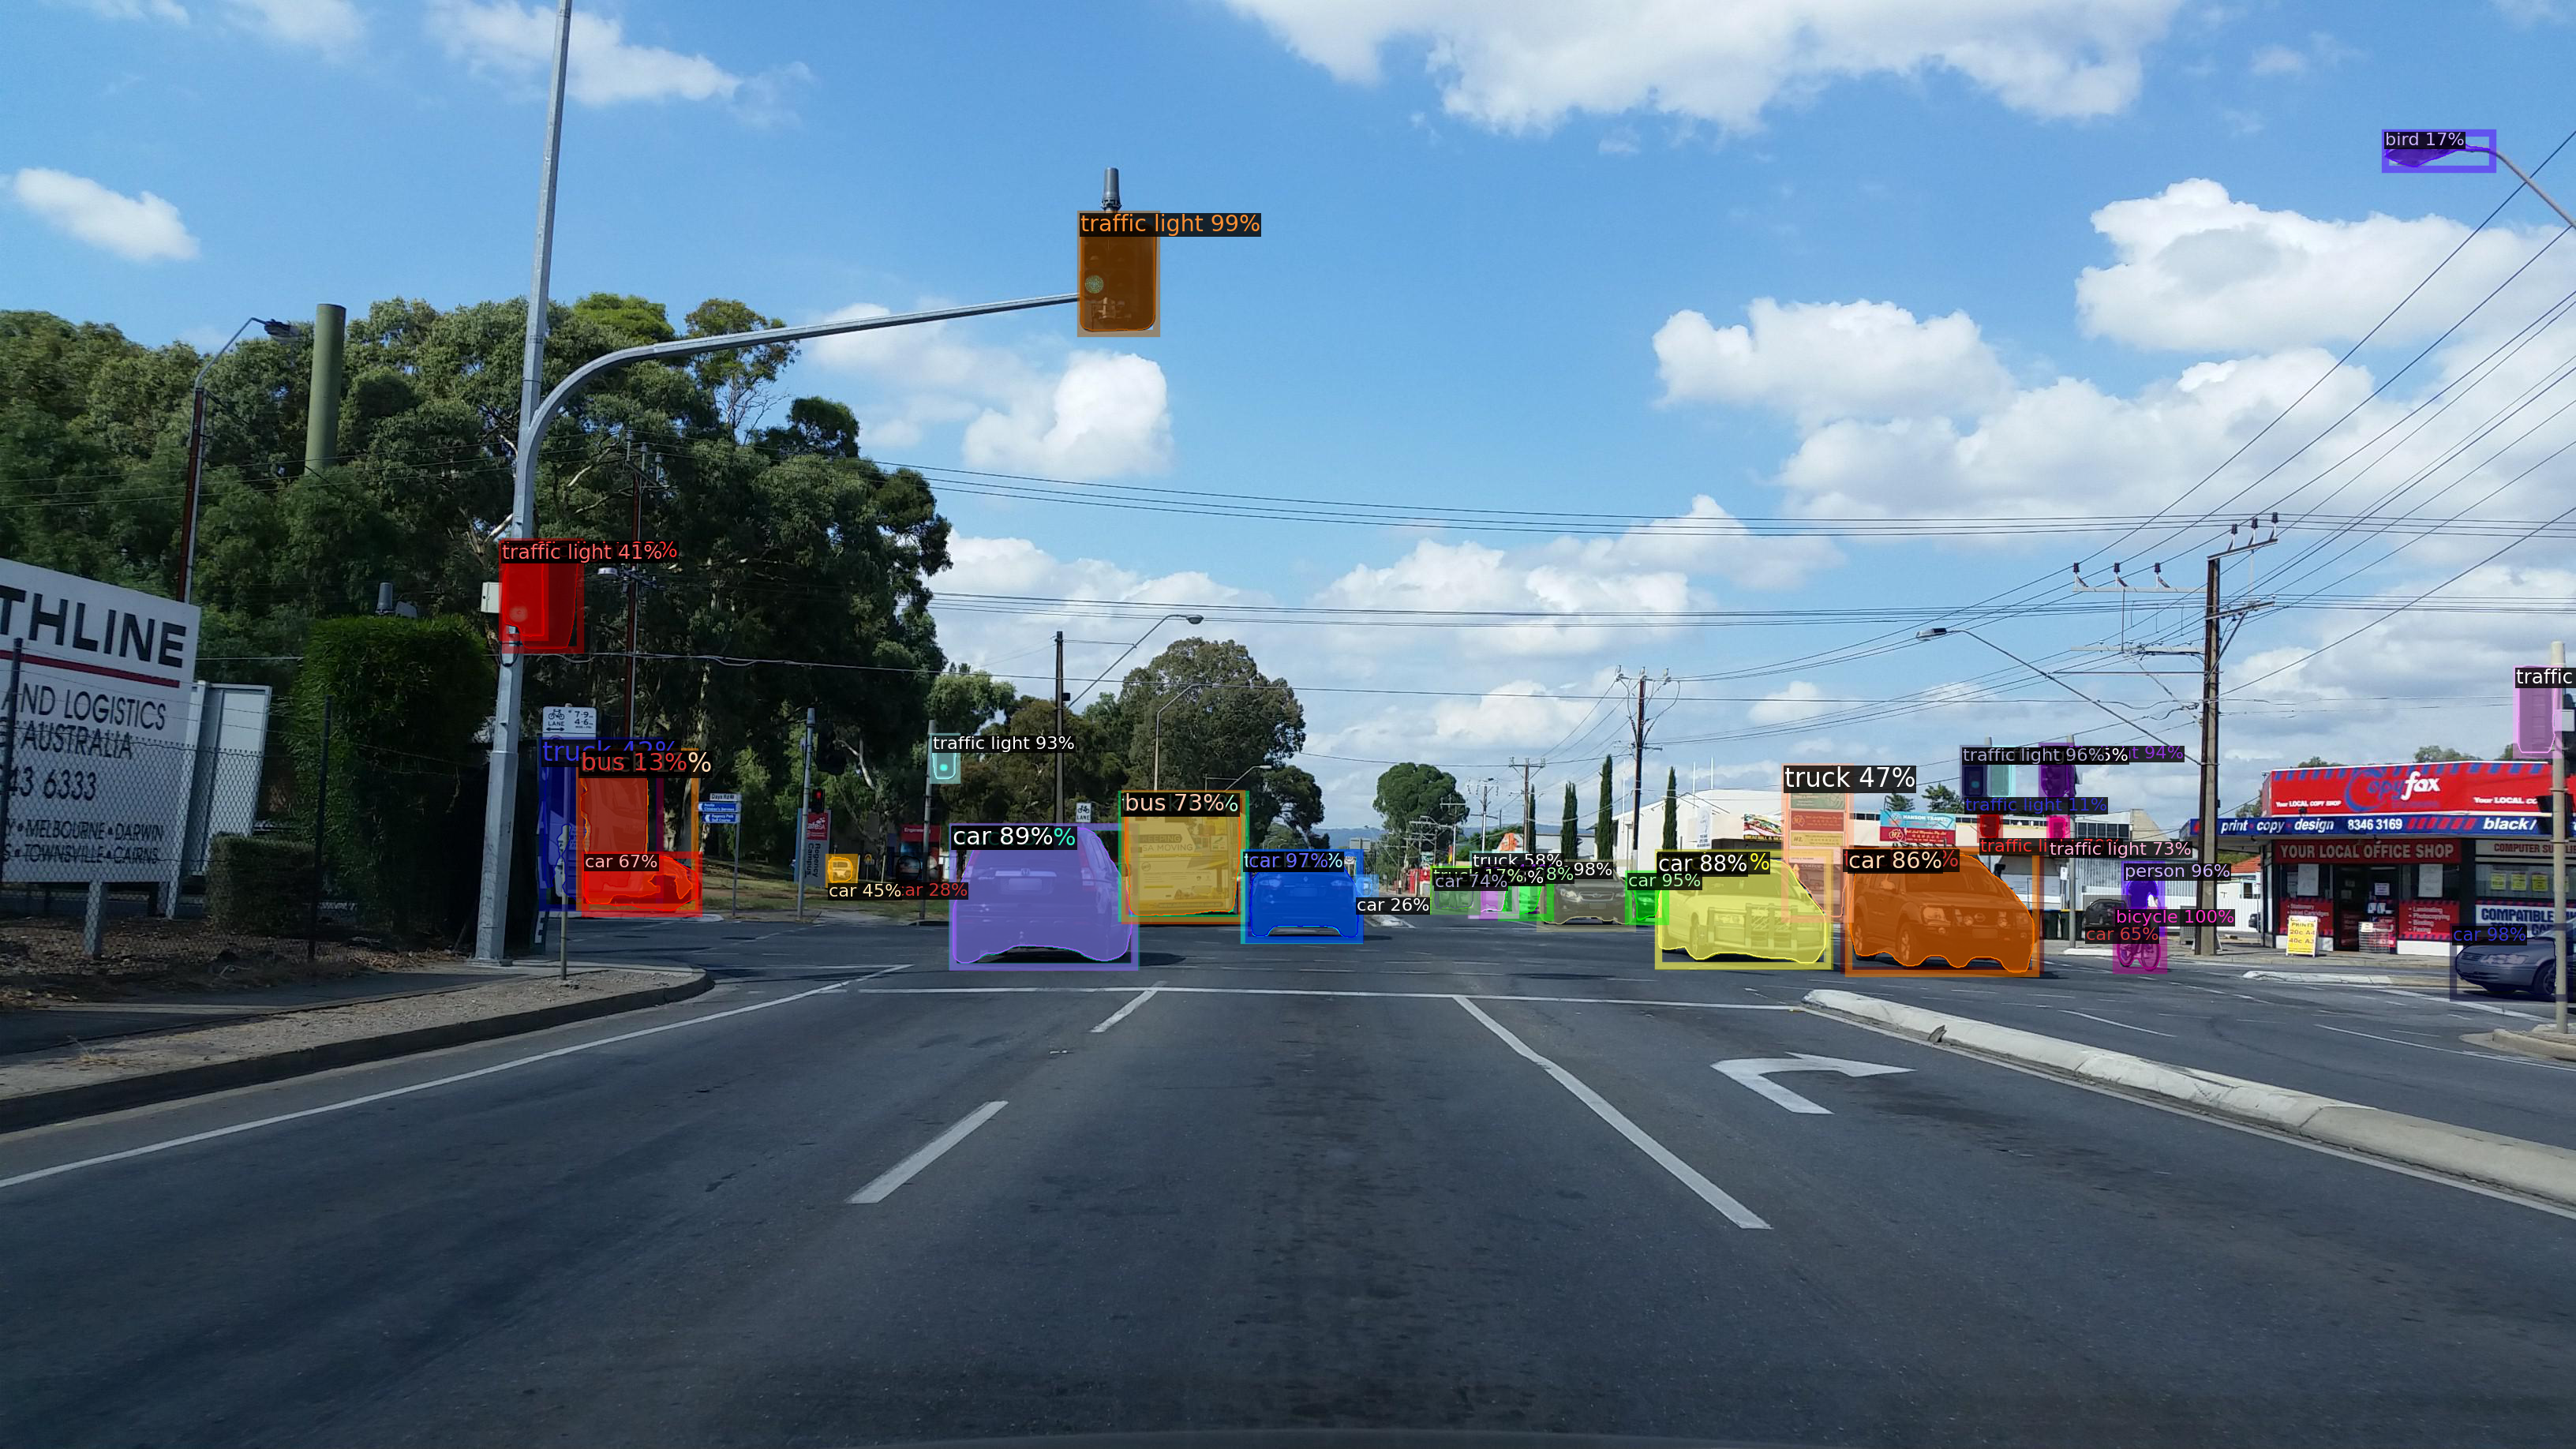
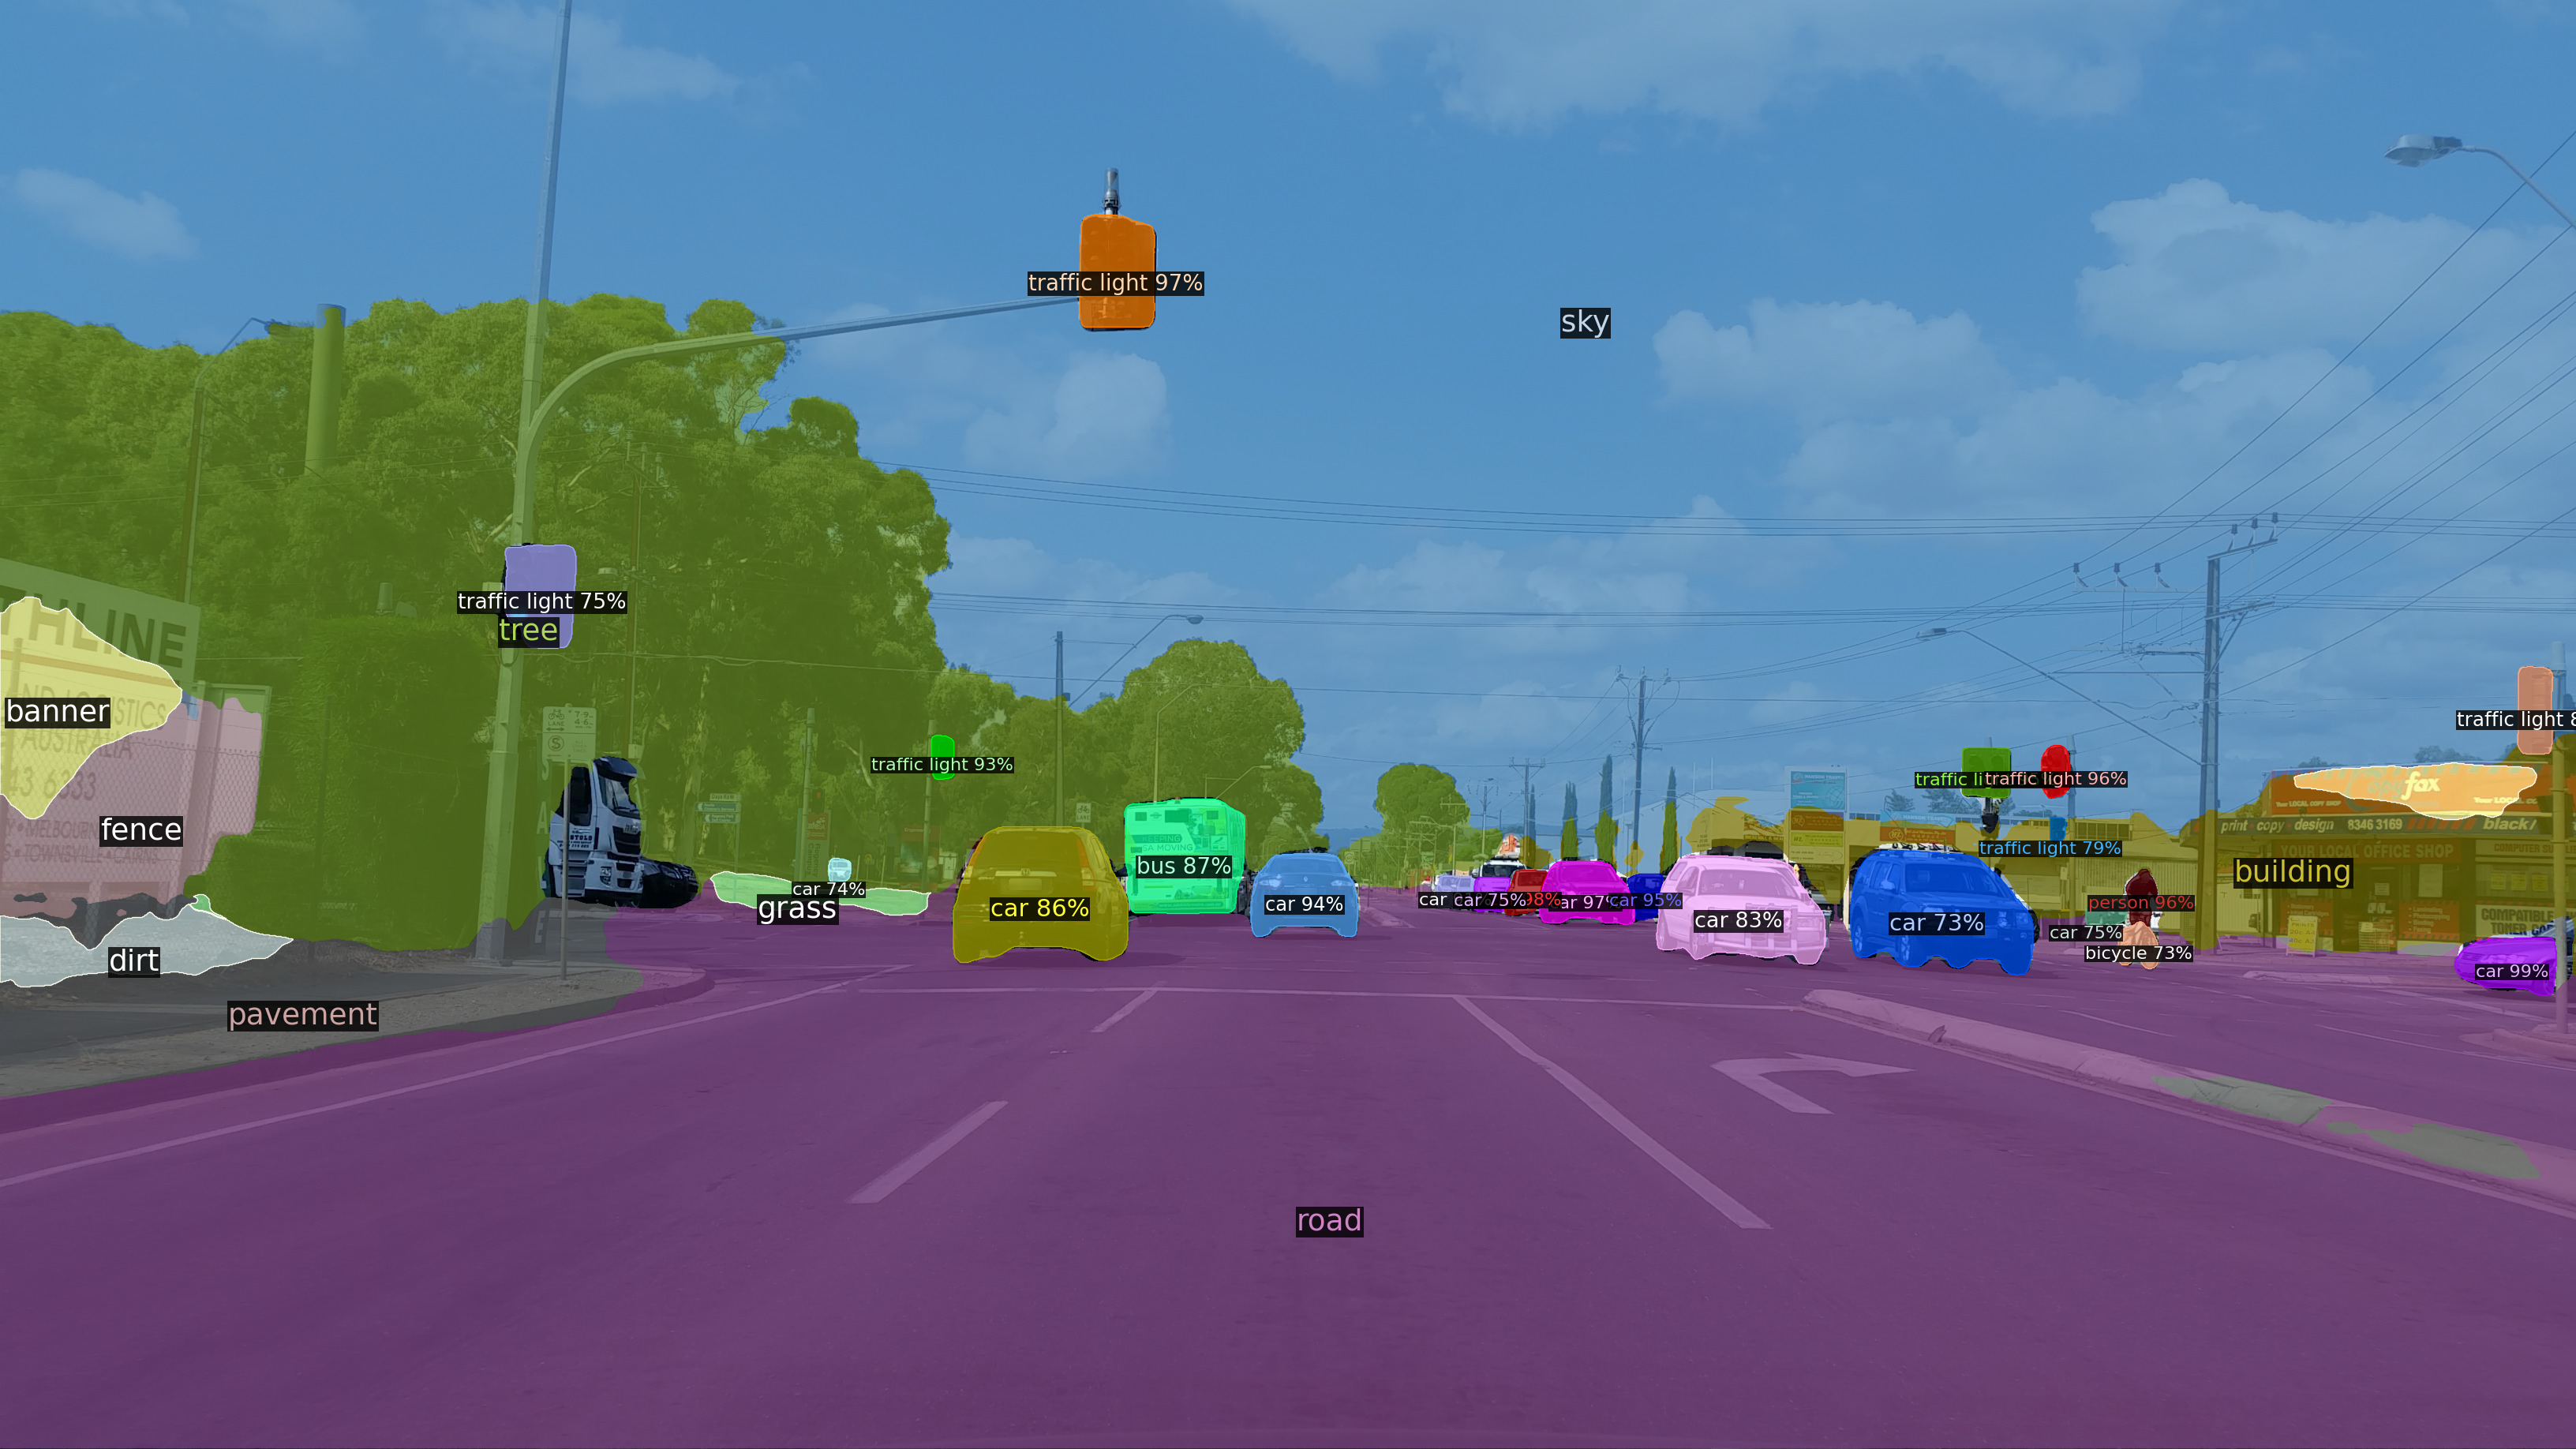
Input and Output Image Samples
I used one sample image from the Mapillary Vistas Dataset to demonstrate the model features. The following images show the input and outputs of the models.
The following code can be found on my Github Repo.
A. Setup the Environment
Assume the reader has already installed the Ananconda Python and know how to create a virtual environment and install necessary packages like NumPy, Matplotlib, Jupyter Notebook, OpenCV by conda or pip commands.
In my GitHub repo, I uploaded the environment.yml file. Readers can use it to create the same virtual environment in your default conda path.
The original Detectron2 Colab Notebook suggests installing the PyTorch with CUDA 10.1 support because Google Colab has CUDA 10.1. As you know, Mac does not support NVIDIA Card, so forget CUDA. In this post, we install the CPU version. If you have Linux machine with powerful Nvidia-Cards, try the GPU version.
I know CPU version is not ideal for computer vision application, but if we are not going to build a model on our local machine, just running inference is OK and doable on images or videos on CPU with an existing detectron2 model. You can try the notebook on the Colab.
Install PyTorch (CPU):
pip install -U torch==1.5 torchvision==0.6
pip install cython pyyaml==5.1
# You can use the following python code to test the installation:

import torch, torchvision
print(torch.__version__, torch.cuda.is_available())
# You will get the following results because our PyTorch version does not support Cuda.
1.5.0 False
Build Detectron2 from Source (CPU version)
Clone the Detectron2 repo to the local drive:
git clone https://github.com/facebookresearch/detectron2.git
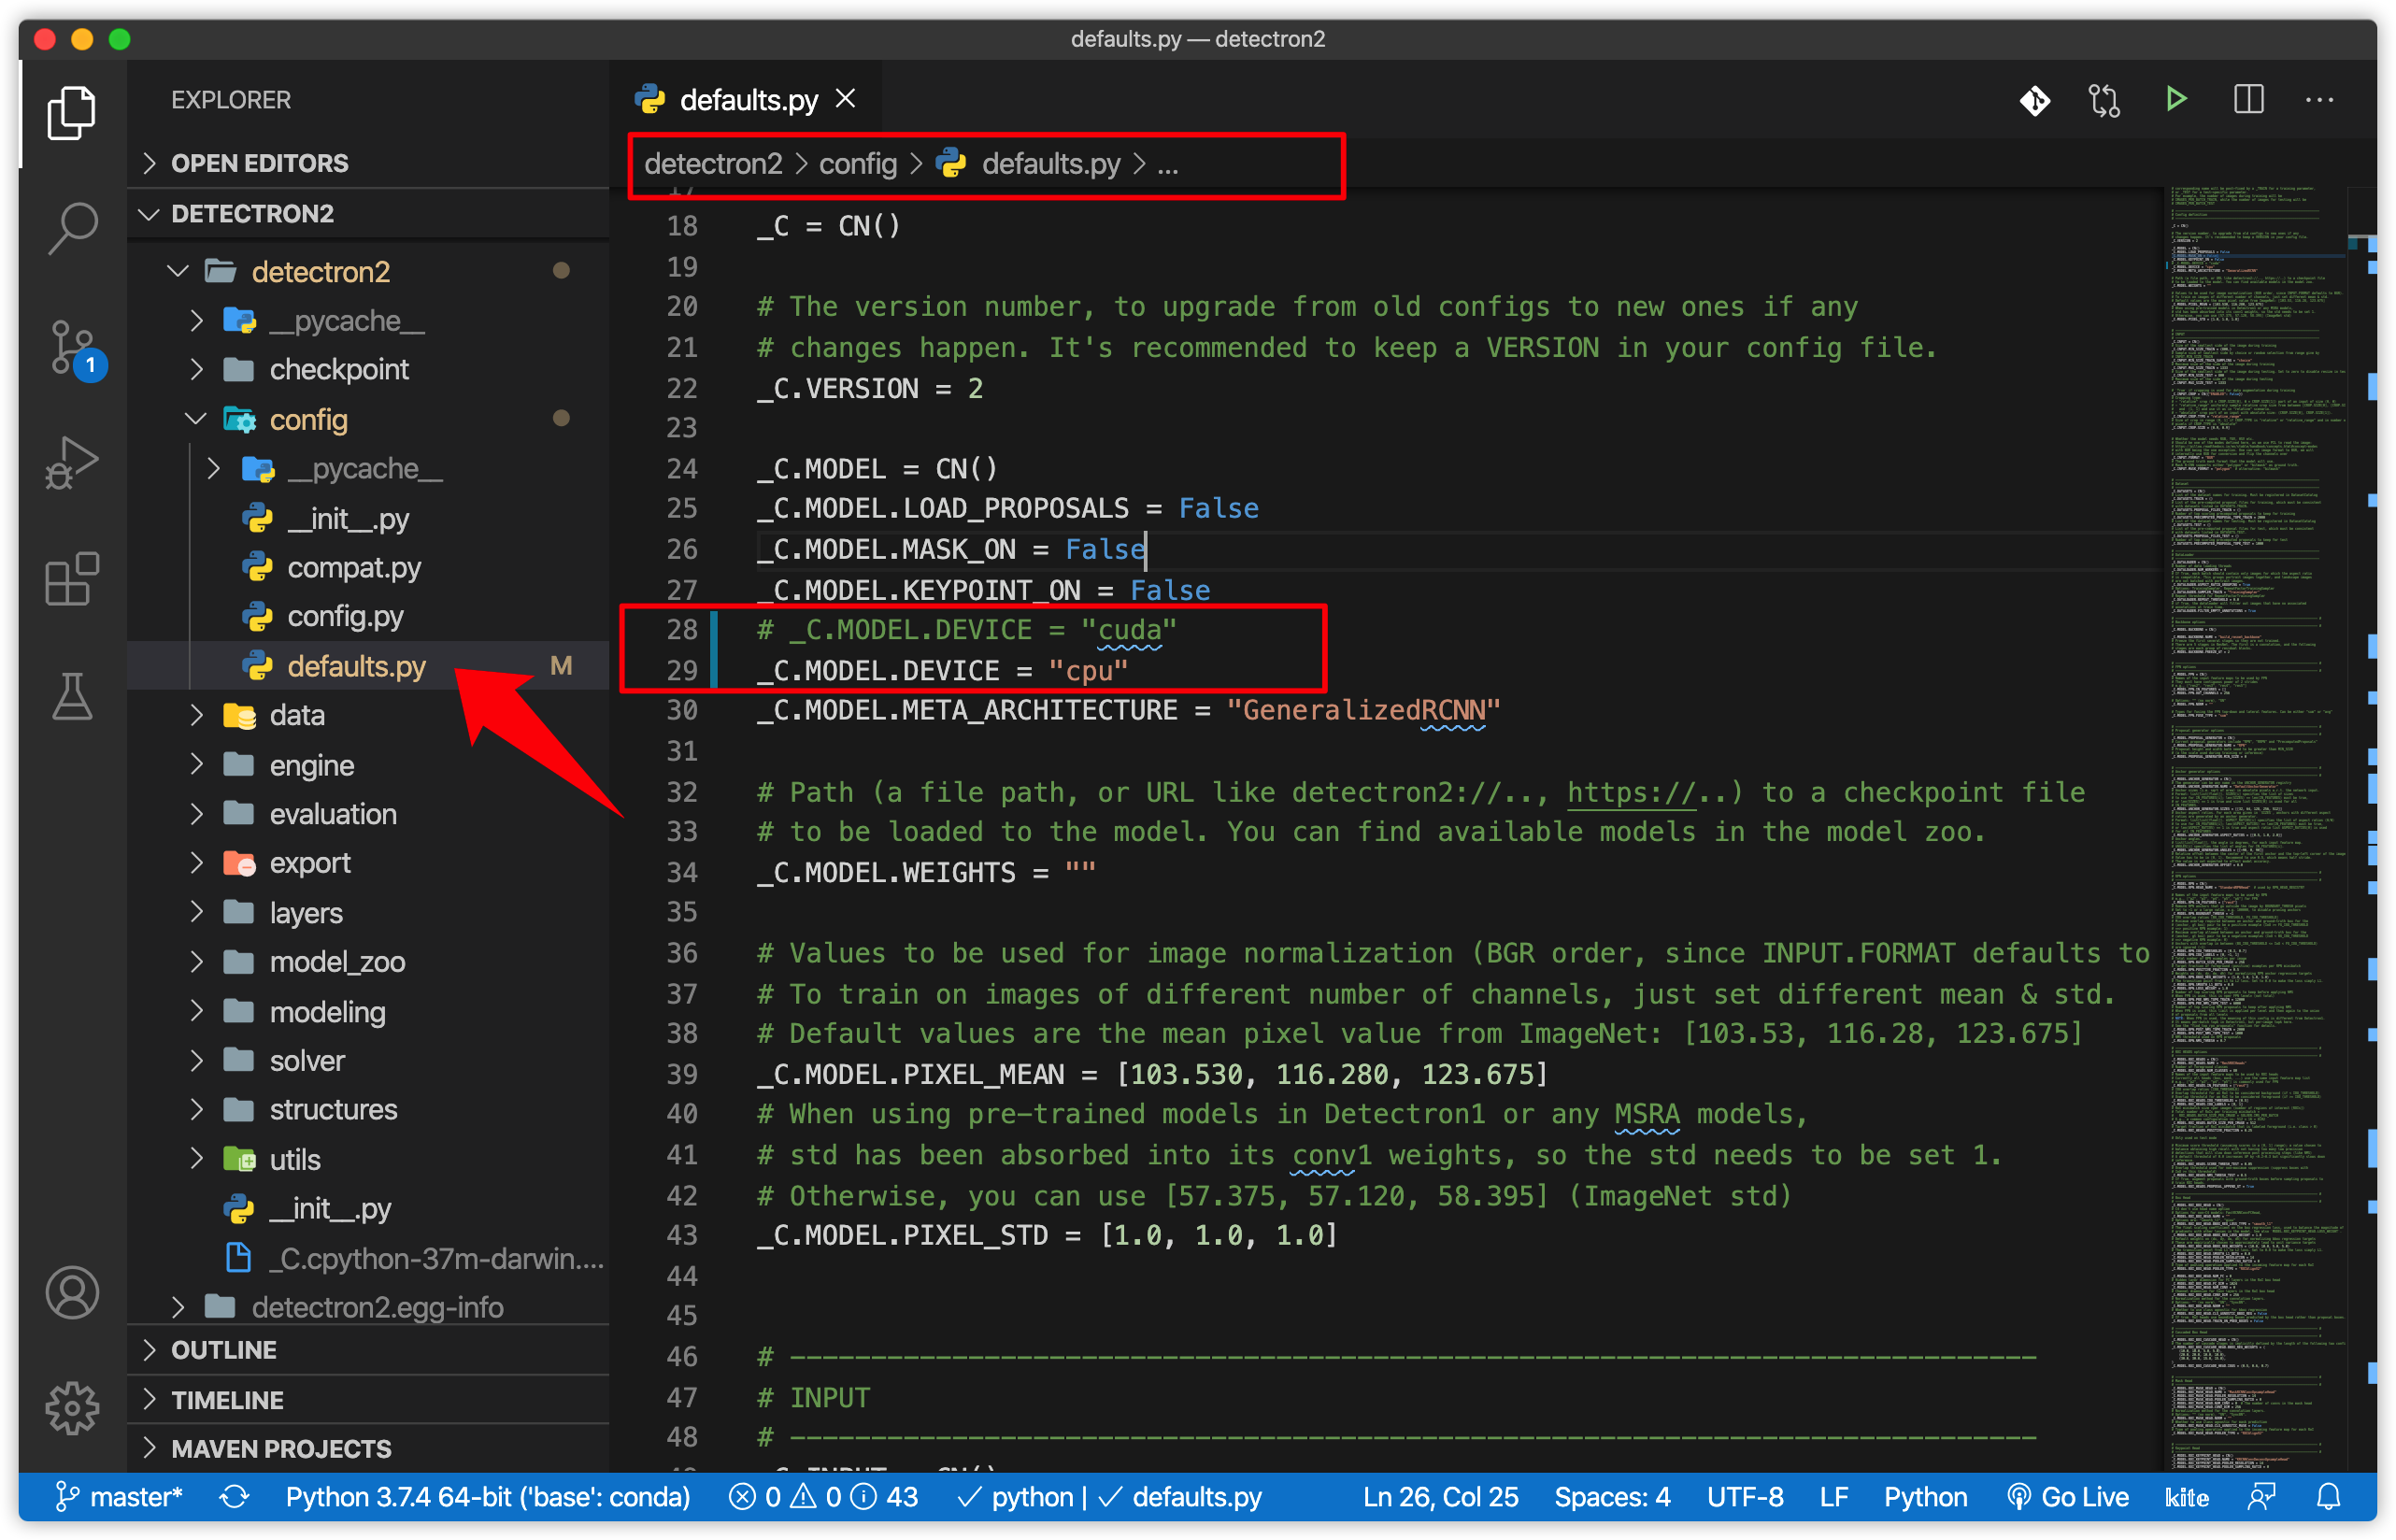
Change the Line 28 in ‘default.py’ in Detectron2/config/default.py’ from “cuda” to “cpu”: #_C.MODEL.DEVICE = “cuda” # Original _C.MODEL.DEVICE = “cpu” # Edit here !!!
Then, back to the upper folder, we rebuild and install the Detectron2 from Source:
CC=clang CXX=clang++ python -m pip install -e detectron2
You can use the following python code to test the installation.
import detectron2
print(detectron2.__version__)
B. Image Inference with Pre-trained Model
The simple approach is to pick a model and its config file from a model zoo, for example, mask_rcnn_R_50_FPN_3x.yaml. Detectron2 provides the demo.py that is able to run builtin standard models. Run it with:
python detectron2/demo/demo.py --config-file detectron2/configs/COCO-PanopticSegmentation/panoptic_fpn_R_101_3x.yaml \
--input input1.jpg input2.jpg \
[--other-options]
--opts MODEL.WEIGHTS detectron2://COCO-InstanceSegmentation/mask_rcnn_R_50_FPN_3x/137849600/model_final_f10217.pkl
According to the detectron2 repo, you can run inference on your webcam.
C. Video Inference with Pre-trained Model
The video inference is almost the same as image inference. Just replace –input files with –video-input video-clip.mp4
python detectron2/demo/demo.py \
--config-file detectron2/configs/COCO-PanopticSegmentation/panoptic_fpn_R_101_3x.yaml \
--video-input  video-clip.mp4 \
--confidence-threshold 0.6 \
--output results/video-output.mkv \
--opts MODEL.WEIGHTS detectron2://COCO-PanopticSegmentation/panoptic_fpn_R_101_3x/139514519/model_final_cafdb1.pkl
D. Apply the GPU version on Colab.
The original Detetron2 Colab notebook already covered the following points:
- Run inference on images or videos, with an existing detectron2 model
- Train a detectron2 model on a new dataset
I just want to add a few more points. You can use the following code in Colab which allows you to upload your local image/video to the Colab drive.
from google.colab import files
uploaded = files.upload()
for fn in uploaded.keys():
    print('User uploaded file "{name}" with length {length} bytes'.format(name=fn, length=len(uploaded[fn])))
Or you can get access of your Google drive by mounting Google Drive locally on Colab with the following command: from google.colab import drivedrive.mount(‘/content/drive’)
You can find more detail on my Jupyter Notebook on Github.
Acknowledgement
The reference for this post is based on the Detecton2 Github.
Detectron2 is Facebook AI Research’s next-generation software system that implements state-of-the-art object detection algorithms.
Find more technical details of Google Colab.
Education is the key to make a difference of the world, please visit https://reap.fsi.stanford.edu/ to find more details.

Leave a comment