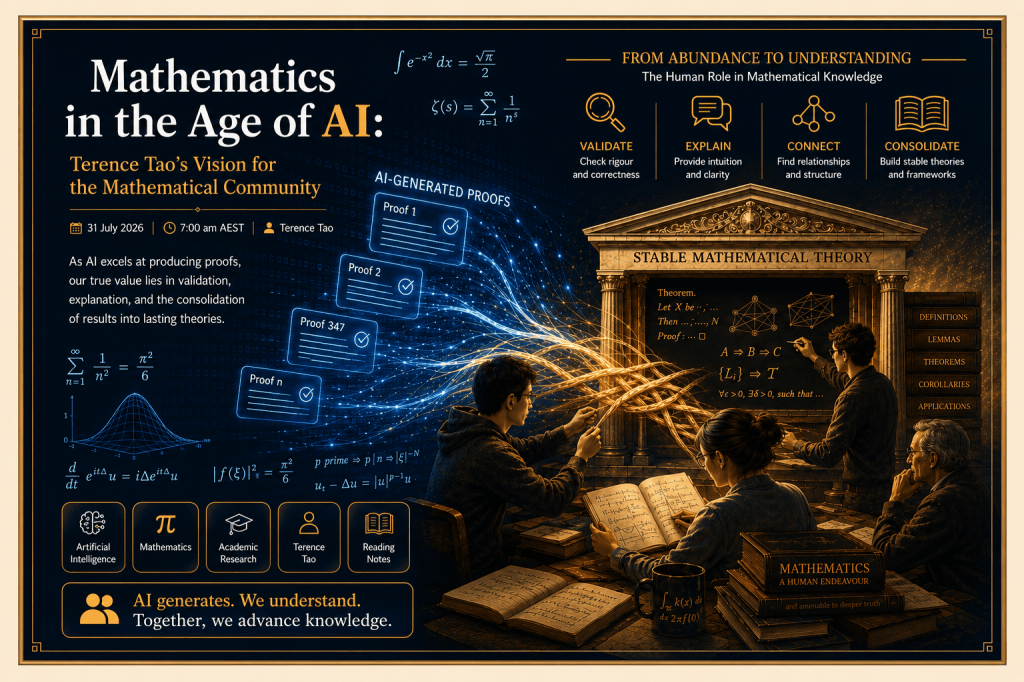
The Transformer from “Attention is All You Need” has been on a lot of people’s minds since 2017.
In this repo, I present an “annotated” version of the Transformer Paper in the form of a line-by-line implementation to build an English-to-Chinese translator with PyTorth deep learning framework.
In this blog, I will review the Classic Technical Framework of the modern (Deep Learning) recommendation system (aka. recommender system).
Before Starting
Before I start, I want to ask readers a question:
What is the first thing you want to do when you start learning a new field X?
Of course, everyone has their own answers, but for me, there are two questions I want to know the most at the beginning. Here X is the recommender system.
What problem is this X trying to solve?
Is there a high-level mind map, so that I can understand the basic concepts, main technologies and development requirements in this X?
Moreover, for the field of “deep learning recommendation system”, there may be a third question.
Why do people keep emphasizing “deep learning“, and what revolutionary impact does deep learning bring to the recommendation system?
I hope that you will find answers to these three questions after reading through this blog.
What is the fundamental problem to be solved by a recommender system?
The applications of recommender systems have gotten into all aspects of life such as shopping, entertainment, and learning. Although the recommendation scenarios such as product recommendation, video recommendation, and news recommendation may be completely different, since they are all called “recommender systems”, the essential problem to be solved there must be the same and follows a common logical framework.
The problem to be solved by the recommender system can be summed up in one sentence:
In the information overload era, how can Users efficiently obtain the Items of their interest?
Therefore, the recommendation system is a bridge built between “the overloaded Internet information” and “users’ interests“.
Let’s take a look at the abstract logical architecture of the recommender system, and then build its technical architecture step by step, so you can have an overall impression of the entire system.
The logical architecture of the recommender system
Starting from the fundamental problem of the recommendation system, we can clearly see that the recommendation system is actually dealing with the relationship between “people” and “information“. That is, based on “people” and “information” to construct a method of finding interesting information for the people.
User – From the perspective of “people“, in order to more reliably infer the interests of “people”, the recommender system hopes to use a large amount of information related to “people”, including historical behaviour, population attributes, relationship networks, etc. They may be collectively referred to as “User Information“.
Item – The definition of “information” has specific meanings and diverse interpretations in different scenarios. For example, it refers to “product information” in product recommendations, “video information” in video recommendations, and “news information” in news recommendations. For convenience, we can collectively refer to them as “Item Information“.
Content – In addition, in a specific recommendation scenario, the user’s final selection is generally affected by a series of environmental information such as time, location, and user status, which can also be called “scene information” or “context information”.
With these definitions, the problem to be dealt with by the recommender system can be formally defined as:
For a certain user U (User), in a specific scenario C (Context), build a function for massive “item” information, predict the user’s preference for a specific candidate item I (Item), and then sort all candidate items according to the preference to generate a recommendation list.
In this way, we can abstract the logical framework of the recommender system as Figure 1. Although this logical framework is relatively simple, it is on this simple basis that we can refine and expand each module to produce the entire technical system.
Figure 1. The logical architecture diagram of the recommender system includes Candidate Item, Recommender System Model of User, Item and Content, and the final Recommendation List.
The Revolution of Deep Learning for Recommender Systems
With the logical architecture of the recommender system (Figure 1), we can answer the third question from the beginning:
“What revolutionary impact does deep learning bring to the recommender system?“
In the logic architecture diagram, the central position is an abstract function f(U, I, C), which is responsible for “guessing” the user’s heart and “scoring” the items that the user may be interested in, so as to obtain the final recommended item list. In the recommender system, this function is generally referred to as the “recommendation system model” (hereinafter referred to as the “recommendation model“).
The application of deep learning to recommendation systems can greatly enhance the fitting and expressive capabilities of recommendation models. Simply put, deep learning is aiming to make the recommendation model “guess more accurately” and better capture the “heart” of users.
So you may still not have a clear concept. Next, let’s compare the difference between the traditional machine learning recommendation model and the deep learning recommendation model from the perspective of the model structure so that you can have a clearer understanding.
Here is a model structure comparison chart in Figure 2, which compares the difference between the traditional Matrix Factorization model and the Deep Learning Matrix Factorization model.
Figure 2. Traditional Matrix Factorization model vs Deep Learning Matrix Factorization model (Neural collaborative filtering). Source: https://arxiv.org/abs/1708.05031
Let’s ignore the details for now. How do you feel at first glance?
Do you feel that the deep learning model has become more complex, layer after layer, and the number of layers has increased a lot?
In addition, the flexible model structure of the deep learning model also gives it an irreplaceable advantage, that is, we can let the neural network of the deep learning model simulate the changing process of many user interests, and even the thinking process of the user making a decision.
For example, Alibaba‘s deep learning model, Deep Interest Evolution Network (Figure 3 DIEN), uses the structure of a three-layer sequence model to simulate the process of users’ interest evolution when purchasing goods, while such a powerful data fitting ability to interpret user behaviour is not available in traditional machine learning models.
Figure 3. Alibaba’s Deep Interest Evolution Network (DIEN) for Click-Through Rate (CTR) Prediction. AUGRU (GRU with attentional update gate) models the interest-evolving process that is relative to the target item. GRU denotes Gated Recurrent Units, which overcomes the vanishing gradients problem of RNN and is faster than LSTM. Source: https://arxiv.org/abs/1809.03672.
Moreover, the revolutionary impact of deep learning on recommender systems goes far beyond that. In recent years, due to the greatly increased structural complexity of deep learning models, more and more data streams are required to converge for the model training, testing and serving. The data storage, processing and updating modules, related to the recommender systems on the cloud computing platforms, have also entered the “deep learning era”.
After talking so much about the impact of deep learning on recommender systems, we seem to have not seen a complete deep learning recommender system architecture. Don’t worry, let’s talk about what the technical architecture of a classic deep learning recommender system looks like in the next section.
Technical Architecture of Deep Learning Recommendation System
The architecture of the deep learning recommender system is actually in the same line as the classic recommender system architecture. It improves some specific modules of the classic architecture to enable and support the application of deep learning. So, I will first talk about the classic recommender system architecture, and then talk about deep learning and its improvements.
In the actual recommender system, there are two types of problems that engineers need to focus on in projects.
Type 1 is about data and information, what are “user information”, “item information” and “scenario information”? How to store, update and process these data?
Type 2 is on recommendation algorithms and models, how to train, predict, and achieve better recommendation results for the system?
The technical architecture of an industrial recommendation system is actually based on these two parts.
The “data and information” part has gradually developed into a data flow framework that integrates offline (nearline) batch processing of data and real-time stream processing in the recommender system.
The “model and algorithm” part is further refined into a model framework that integrates training, evaluation, deployment, and online inference in the recommender system.
Based on this, we can summarize the technical architecture diagram of the recommender system as in Figure 4.
Figure 4. Diagram of the technical architecture of the recommendation system
In Figure 4, I divided the technical architecture of the recommender system into a “data part” and a “model part”.
Part 1: Data Framework
The “data part” of the recommender system is mainly responsible for the collection and processing of “user“, “item” and “content” information. Based on the difference in the amount of data and the real-time processing requirements, we use three different data processing methods sorted by the order of real-time performance, they are:
Client and Server end-to-end real-time data processing.
Real-time stream data processing.
Big data offline processing.
From 1 to 3, the real-time performance of these methods decreases from strong to weak, and the massive data processing capabilities of the three methods increase from weak to strong.
Method
Real-Time Performance
Data Processing Capability
Possible Solutions
Client and Server end-to-end real-time data processing
Strong
Weak
Flink
Real-time stream data processing
Medium
Medium
…
Big data offline processing
Weak
Strong
Spark
Therefore, the data flow system of a mature recommender system will complement each other and use them together.
The big data computing platform (e.g., AWS, Azure, GCP, etc.) of the recommender system can extract training data, feature data, and statistical data through the processing of the system logs, and metadata of items and users. So what are these data for?
Specifically, there are three downstream applications based on the data exported from the data platform:
Generate the Sample Data required by the recommender system model for the training and evaluation of the algorithm model.
Generate “user features“, “item features” and a part of “content features” required by the recommendation system model service (Model Serving) for online inference.
Generate statistical data required for System Monitoring and Business Intelligence (BI) systems.
The data part is the “water source” of the entire recommender system. Only by ensuring the continuity and purity of the “water source” can we continuously “nourish” the recommender system so that it can operate efficiently and output accurately.
In the deep learning era, models have higher requirements for “water sources”. First of all, the amount of water must be large. Only in this way can we ensure that the deep learning models we build can converge as soon as possible; Secondly, the “water flow” should be fast, so that the data can flow to the system modules for model updates and adjustments. Thus, the model can grasp the changes on user interest in real-time. This is the same reason causing the rapid development and application of big data engine (Spark) and the stream computing platform (Flink).
Part II: Model Framework
The “model part” is the major body of the recommender system. The structure of the model is generally composed of “recall layer“, “ranking layer” and “supplementary (auxiliary) strategy and algorithm layer“.
The “recall layer” is generally composed of efficient recall rules, algorithms or simple models, which allow the recommender system to quickly recall items that users may be interested in from a massive candidate set.
The “ranking layer” uses the ranking/sorting model(s) to fine-sort-rank the candidate items that are initially screened by the recall layer.
The “supplementary strategy and algorithm layer“, also known as the “re-ranking layer“, is a combination of some supplements to take into account indicators such as “diversity“, “popularity” and “freshness” of the results before returning to the user recommendation list. The strategy and algorithm make more adjustments to the item list and finally form a user-visible recommendation list.
The “model serving process” means the recommender system model receives a full candidate item set and then generates the recommendation list.
In order to optimise the model parameters required by the model service process, we need to determine the model structure, the specific values of the different parameter weights in the structure, and the parameter values in the model-related algorithms and strategies through model training.
The training methods can be divided into two parts: “offline training” and “online updating” according to different environments.
The advantage of offline training is that the optimizer can use the full samples and all the features to build the model approach to the global optimal performance.
While online updating can “digest” new data samples in real-time, learn and reflect new data trends more quickly, and meet the real-time recommending requirements.
In addition, in order to evaluate the performance of the recommender system model and optimize the model iteratively, the model part of the recommender system also includes various evaluation modules such as “offline evaluation” and “online A/B test“, which are used to obtain offline and online indicators to guide the model iteration and optimization.
We just said that the revolution of deep learning for recommender systems is in the model part, so what are the specifics?
I summarized the most typical deep learning applications into 3 points:
The application of embedding technology in the recall layer in deep learning. Embedding technology of deep learning is already a mainstream solution in the industry to support the recall layer to quickly generate user-related items.
The application of deep learning models with different structures in the ranking layer. The ranking layer (also known as the fine sorting layer) is the most important factor affecting the system performance, and it is also the area where the deep learning models show their strengths. The deep learning model has high flexibility and strong expressive ability, which makes it suitable for accurate sorting under large data volumes. There is no doubt that the deep learning ranking model is a hot topic in both industry and academia. It will keep gaining investments and being rapidly iterated by researchers and engineers.
The application of reinforcement learning in the direction of model updating and integration (CI/CD). Reinforcement learning is another field of machine learning closely related to deep learning. Its application in recommender systems enables the systems to take a higher level of real-time performance.
Summary
In this blog, I reviewed the technical architecture of the deep learning recommendation system. Although it involves a lot of content, you don’t have to worry about it if you cannot remember all the details. All you need is to keep the impression of this framework in your mind.
You can use the content of this framework as a technical index of a recommender system, making it your own knowledge map. Visually speaking, you can think of the content of this blog as a tree of knowledge, which has roots, stems, branches, leaves, and flowers.
Let’s recall the most important concepts again:
The root is that the recommender system aims to solve the challenge of how to help users efficiently obtain the items of interest in this “information overload” era.
The stems of the recommender system are the logical architecture of the recommendation system: for a user U (User), in a specific scenario C (Context), a function is constructed for a large number of “items” (products, videos, etc) to predict the user’s response to a specific candidate item I (Item). ) with the degree of preference.
The branches and leaves are the technical modules of the recommender system and the algorithms/models of each module, respectively. The technical module supports the technical architecture of the system, and the algorithms/models allow us to develop various functions in the system and deliver the results.
Finally, the application of deep learning is undoubtedly the pearl of the current technical architecture of recommender systems. It is like a flower blooming on this big tree, and it is the most wonderful finishing touch.
The structure of the deep learning model is complex, but its data fitting ability and expression ability are stronger, so the recommender model can better simulate the user’s interest-changing process and even the decision-making process. The development of deep learning has also promoted a revolution in the data flow framwork, leading to higher requirements for cloud computing service providers to process the data faster and stronger.
Hope you like this blog. To be continued, the Next Blog will be Deep Learning Recommender Systems Part 2: Feature Engineering.
One more thing…
Figure 5 is the recommender system of Netflix. Here is the challenge, can you combine the technical framework of the recommender system discussed in this blog to tell which parts are the data part and which are the model part in the diagram?
Figure 5. Diagram of Netflix recommender system architecture
Reference:
[1] 极客时间《深度学习推荐系统实战》, 王喆 Roku 推荐系统架构负责人,前 hulu 高级研究员,《深度学习推荐系统》作者.
[2] He, Xiangnan, Lizi Liao, Hanwang Zhang, Liqiang Nie, Xia Hu, and Tat-Seng Chua. “Neural collaborative filtering.” In Proceedings of the 26th international conference on world wide web, pp. 173-182. 2017.
[3] Zhou, Guorui, Na Mou, Ying Fan, Qi Pi, Weijie Bian, Chang Zhou, Xiaoqiang Zhu, and Kun Gai. “Deep interest evolution network for click-through rate prediction.” In Proceedings of the AAAI conference on artificial intelligence, vol. 33, no. 01, pp. 5941-5948. 2019.
This blog demonstrates how to use Pytorch to build deep convolutional neural networks and use Qt to create the GUI with the pre-trained model. The final app runs like the figure below.
Qt GUI with pre-trained Deep ConvNets model for Oracle Bone Scripts Recognition: Model predicts the Oracle Bone Script ‘合’ with 99.8% Acc.
The five original oracle bone scripts in this sample image can be translated into modern Chinese characters as “贞,今日,其雨?” (Test: Today, will it rain?)
Please note that I am not an expert in the ancient Chinese language, and I think the translation may not be that accurate. But in the GUI, the user can draw the script in the input panel and then click the run button to get the top 10 Chinese characters ranked by probabilities. The highest result is presented with green background colour and 99.8% accuracy.
I will assume that readers have a basic understanding of the deep learning model, middle-level skills of python programming, and know a little about UX/UI design with Qt. There are awesome free tutorials on the internet or one could spend a few dollars to join online courses. I see no hurdles for people mastering these skills.
The following sections are arranged with the topics as follows. Explain the basic requirements for this project and then cover all the basic steps in detail:
Init the project
Create the Python Environment and Install the Dependencies
I used cookiecutter package to generate a skeleton of the project.
There are some opinions implicit in the project structure that has grown out of our experience with what works and what doesn’t when collaborating on data science projects. Some of the opinions are about workflows, and some of the opinions are about tools that make life easier.
Data is immutable
Notebooks are for exploration and communication (not for production)
Analysis is a DAG (I used the ‘Makefile’ to create command modules of the workflow)
Build from the environment up
Starting Requirements
conda 4.12.0
Python 3.7, 3.8 I would suggest using Anaconda for the installation of Python. Or you can just install the miniconda package, which saves a lot of space on your hard drive
3. Tutorial Step by Step
Step 1: Init the project
Use ‘git’ command to clone the project from Github.
cd PROJECT_DIR
git clone https://github.com/cuicaihao/deep-learning-for-oracle-bone-script-recognition
# or
# gh repo clone cuicaihao/deep-learning-for-oracle-bone-script-recognition
Check the project structure.
cd deep-learning-for-oracle-bone-script-recognition
ls -l
# or
# tree -h
You will see a similar structure as the one shown in the end. Meanwhile, you could open the ‘Makefile’ to see the raw commands of the workflow.
Step 3: Download the Raw Data and Preprocess the Data
This first challenge is to find a data set with the oracle bone scripts; I found this website 甲骨文 and its GitHub Repo which provided all the script images and image-to-label database I need. The image folder contains 1602 images, and the image name to Chinese character (key-value) pairs are stored in JSON, SQL and DB format, making it the perfect data set for our project startup.
甲骨文网页
we can download the raw data of the images and database of the oracle bone script. Then we will download the raw data and preprocess the data in the project data/raw directory.
make download_data
The basic step is to download repository, unzip the repo, and then make a copy of the images and database (JSON) file to the project data/raw directory.
Then, we preprocess the data to create a table (CSV file) for model development.
make create_dataset
The source code is located at src/data/make_dataset.py. The make command will provide the input arguments to this script to create two tables (CSV file) in the project data/processed directory.
The Raw Data of the Oracle Bone Scripts with the Image-Name Paris.
Step 4: Build the Model with Pytorch
This section is about model development.
4.1 Review Image and DataLoader
Before building the model, we need to review the image and data loader.
make image_review
This step will generate a series of images of the oracle bone script image sample to highlight the features of the images, such as colour, height, and width.
Besides, we show the results of different binarization methods of the original greyscale image with the tool provided by the scikit-image package.
The source code is located at src/visualization/visualize.py.
In the image below, it generates a batch of 64 images with its label(Chinese characters) on the top-left corner.
A Batch of 8×8 Grid Images Prepared for Deep ConvNets Model
4.3 Build the Deep Convolutional Neural Networks Model
Now we can build the model. The source code is located at src/models/train_model.py. This command will generate the model and the training process records at models/.
make train_model
(Optional) One can monitor the process by using the tensorboard command.
# Open another terminal
tensorboard --logdir=models/runs
Then open the link: http://localhost:6006/ to monitor the training and validation losses, see the training batch images, and see the model graph.
After the training process, there is one model file named model_best in the models/ directory.
4.4 Test the Model with Sample Image
The pre-trained model is located at models/model_best. We can test the model with the sample image. I used the image (3653610.jpg) of the oracle bone script dataset in the Makefiletest_model scripts, readers can change it to other images.
The command will generate a sample figure with a predicted label on the top and a table with the top 10 predicted labels sorted by the probability.
Model Prediction Label and Input Image
Step 5: Test the Model with Qt-GUI
Now, we have the model, we can test the model with the Qt-GUI. I used Qt Designer to create the UI file at src/ui/obs_gui.ui. Then, use the pyside6-uic command to get the Python code from the UI file `pyside6-uic src/ui/obs_gui.ui -o src/ui/obs_gui.py.
The GUI contains an input drawing window for the user to scratch the oracle bone script as an image. After the user finishes the drawing and clicks the RUN button. The input image is converted to a tensor (np.array) and fed into the model. The model will predict the label of the input image with probability which is shown on the top Control Panel of the GUI.
Text Label 1: Show the Chinese character label of the input image ID and the Prediction Probability. If the Acc > 0.5, the label background colour is green; if the Acc < 0.0001, the label background colour is red. Otherwise, the label background colour is yellow.
Test Label 2: Show the top 10 predicted labels sorted by the probability.
Clean Button: Clean the input image.
Run Button: Run the model with the input image.
Translate Button: (Optional) Translate the Chinese character label to English. I did not find a good Translation service for a single character, so I left this park for future development or for the readers to think about it.
4 Summary
This repository is inspired by the most recent DeepMind’s work Predicting the past with Ithaca, I did not dig into the details of the work due to limited resources.
I think the work is very interesting, and I want to share my experience with the readers by trying a different language like Oracle Bone Scripts. It is also a good starter example for me to revisit the PyTorch deep learning packages and the qt-gui toolboxes.
I will be very grateful if you can share your experience with more readers. If you like this repository, please upvote/star it.
Conclusion
I made a formal statement on my GitHub on the first day of 2022, claiming that I would create 10 blogs on technology, but I got flattened by daily business and other work. But be a man of his word, I made my time to serve the community. Here comes the first one.
If you find the repository useful, please consider donating to the Standford Rural Area Education Program (https://sccei.fsi.stanford.edu/reap/): Policy change and research to help China’s invisible poor.
Aerial Image Labeling addresses a core topic in remote sensing: the automatic pixel-wise labelling of aerial imagery. The UNet leads to more advanced design in Aerial Image Segmentation. Future updates will gradually apply those methods to this repository.
I created the Github Repo used only one sample (kitsap11.tif ) from the public dataset (Inria Aerial Image Labelling ) to demonstrate the power of deep learning.
The original sample has been preprocessed into 1000×1000 with a 1.5-meter resolution. The following image shows the models prediction on the RGB images.
Programming details are updated on Github repos.
Dataset Features
The Inria Aerial Image Labeling addresses a core topic in remote sensing: the automatic pixel-wise labelling of aerial imagery (link to paper). Coverage of 810 km² (405 km² for training and 405 km² for testing) Aerial orthorectified colour imagery with a spatial resolution of 0.3 m Ground truth data for two semantic classes: building and not building (publicly disclosed only for the training subset) The images cover dissimilar urban settlements, ranging from densely populated areas (e.g., San Francisco’s financial district) to alpine towns (e.g,. Lienz in Austrian Tyrol).
Instead of splitting adjacent portions of the same images into the training and test subsets, different cities are included in each of the subsets. For example, images over Chicago are included in the training set (and not on the test set) and images over San Francisco are included on the test set (and not on the training set). The ultimate goal of this dataset is to assess the generalization power of the techniques: while Chicago imagery may be used for training, the system should label aerial images over other regions, with varying illumination conditions, urban landscape and time of the year.
The dataset was constructed by combining public domain imagery and public domain official building footprints.
Notification
The full data set is about 21 GB. In this repo, I select the following image as examples:
The original program is written in Python, and uses [PyTorch], [SciPy]. A GPU is not necessary but can provide a significant speedup especially for training a new model. Regular sized images can be styled on a laptop or desktop using saved models.
More details about the algorithm could be found in the following papers:
In five courses, you are going learn the foundations of Deep Learning, understand how to build neural networks, and learn how to lead successful machine learning projects. You will learn about Convolutional networks, RNNs, LSTM, Adam, Dropout, BatchNorm, Xavier/He initialization, and more. You will work on case studies from healthcare, autonomous driving, sign language reading, music generation, and natural language processing. You will master not only the theory, but also see how it is applied in industry. You will practice all these ideas in Python and in TensorFlow, which we will teach.
In this paper, the authors propose a taxonomy of efficient Transformer models, characterizing them by the technical innovation and primary use case.
Transformer model architectures have garnered immense interest lately due to their effectiveness across a range of domains like language, vision and reinforcement learning. In the field of natural language processing for example, Transformers have become an indispensable staple in the modern deep learning stack. Recently, a dizzying number of “X-former” models have been proposed – Reformer, Linformer, Performer, Longformer, to name a few – which improve upon the original Transformer architecture, many of which make improvements around computational and memory efficiency. With the aim of helping the avid researcher navigate this flurry, this paper characterizes a large and thoughtful selection of recent efficiency-flavored “X-former” models, providing an organized and comprehensive overview of existing work and models across multiple domains.
In this paper, the authors propose a taxonomy of efficient Transformer models, characterizing them by the technical innovation and primary use case. Specifically, they review Transformer models that have applications in both language and vision domains, attempting to consolidate the literature across the spectrum. They also provide a detailed walk-through of many of these models and draw connections between them.
In the section 2, authors reviewed the background of the well-established Transformer architecture. Transformers are multi-layered architectures formed by stacking Transformer blocks on top of one another.
I really like the 2.4 section, when the authors summarised the the differences in the mode of usage of the Transformer block. Transformers can primarily be used in three ways, namely:
Encoder-only (e.g., for classification)
Decoder-only (e.g., for language modelling, GPT2/3)
Encoder-decoder (e.g., for machine translation)
In section 3, they provide a high-level overview of efficient Transformer models and present a characterization of the different models in the taxonomy with respect to core techniques and primary use case. This is the core part of this paper covering 17 different papers’ technical details.
Summary of Efficient Transformer Models presented in chronological order of their first public disclosure.
In the last section, authors address the state of research pertaining to this class of efficient models on model evaluation, design trends, and more discussion on orthogonal efficiency effort, such as Weight Sharing, Quantization / Mixed precision, Knowledge Distillation, Neural Architecture Search (NAS) and Task Adapters.
In sum, this is a really good paper summarised all the important work around the Transformer model. It is also a good reference for researcher and engineering to be inspired and try these techniques for different models in their own projects.
FYI, here is my early post The Annotated Transformer: English-to-Chinese Translator with source code on GitHub, which is an “annotated” version of the 2017 Transformer paper in the form of a line-by-line implementation to build an English-to-Chinese translator via PyTorch ML framework.
In this post, I would like to share my practice with Facebook’s new Detectron2 package on macOS without GPU support for street view panoptic segmentation. If you want to create the following video by yourself, this post is all you need. This demo video clip is from my car’s dashcam footages from Preston, Melbourne. I used the PyTorch and Detectron2 to create this video with segmentation masks.
You know in Australia there is a ‘Covidsafe app‘ for everyone.
The COVIDSafe app speeds up contacting people exposed to coronavirus (COVID-19). This helps us support and protect you, your friends and family. Please read the content on this page before downloading. At the end of the Australian COVID-19 pandemic, users will be prompted to delete the COVIDSafe app from their phone. This will delete all app information on a person’s phone. The information contained in the information storage system will also be destroyed at the end of the pandemic.
Here is the introduction video:
So, all those descriptions are trying to tell your information is safe and your privacy is protected with this app. By the way, the COVIDSafe app is the only contact tracing app approved by the Australian Government. I think this means it is the first official one.
This post is for viewers who want to understand a little bit deeper technical details about the technology used in this app. I will quote the document from Apple and keep it as simple as possible. I am not an IOS developer. I am just as curious as you, trying to understand how it measures the risk. And I am not sure if the COVIDSafe app used apple’s framework, LOL~
My only sources are from the webpages of the Australian Government Department of Health and Apple [iOS Framework Document] Exposure Notification April 2020. You can click these Keywords to learn more background knowledge around this app: COVIDSafe, Mesh Network; GDPR; DP3T; Beacon.
So, according to Apple’s document, the following diagram illustrates the general format of Exposure Risk Level Calculation:
Exposure Risk Level Parameters
Transmission Risk — An app-defined flexible value to tag a specific positive key. This value could be tagged based on symptoms, level of diagnosis verification, or other determination from the app or health authority.
Duration (measured by API) — Cumulative duration of the exposure. Days (measured by API) – Days since the exposure incident.
Attenuation (measured by API) – Minimum Bluetooth signal strength attenuation (Transmission Power subtract RSSI).
Level Value: The value, ranging from 1 to 8, that the app assigns to each Level in each of the Exposure Risk Level Parameters.
Level: The eight levels contained within each Exposure Risk Level Parameter.