Skip to content
Facebook
Twitter
Instagram
TikTok
YouTube
Search
C. Cui's Blog
OpenSource
2026-05-10
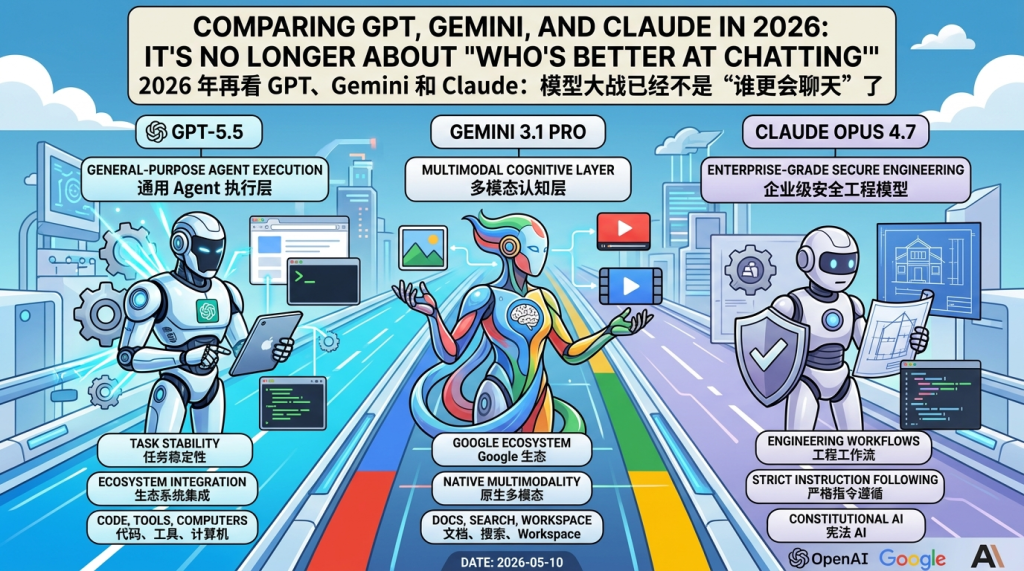
Comparing GPT, Gemini, and Claude in 2026: It’s No Longer About ‘Who’s Better at Chatting’
Chris Cui
2026-04-25
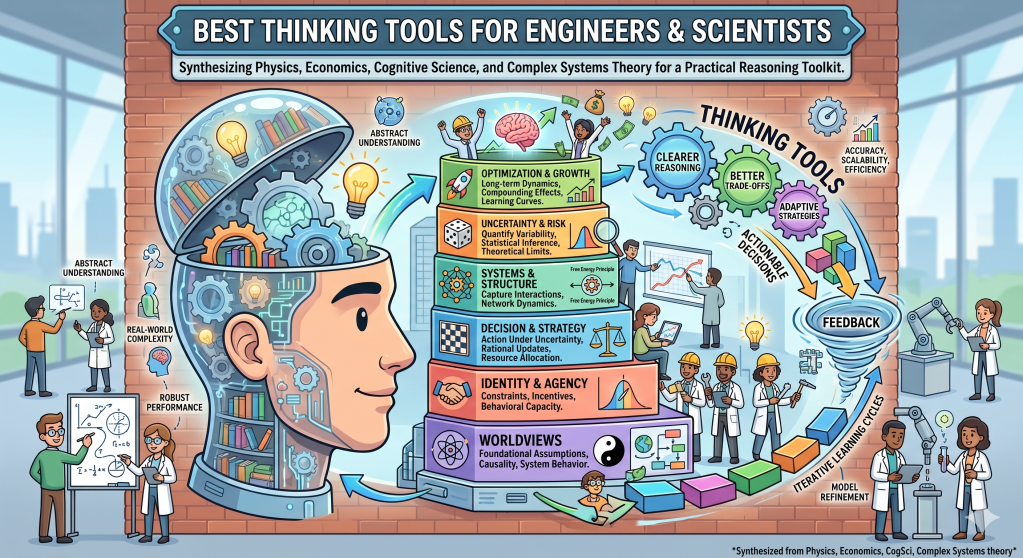
The Architecture of Thinking: Cognitive Models for Complex Systems and Decision-Making
Chris Cui
2026-02-08
仙侠演义下的人工智能大道之争
Chris Cui
2025-08-20
AI-Powered Search: Google’s Transformation vs. Perplexity
Chris Cui
2025-05-31
Our Future with AI: Three Strategies to Ensure It Stays on Our Side
Chris Cui
2024-10-19
2024 Guest Lecture Notes: AI, Machine Learning and Data Mining in Recommendation System and Entity Matching
Chris Cui
2024-05-04
The Future of Coding: Will Generative AI Make Programmers Obsolete?
Chris Cui
2024-04-20
Enigma – Mission X Challenge Accomplished with Python
Chris Cui
2022-04-03
Deep ConvNets for Oracle Bone Script Recognition with PyTorch and Qt-GUI
Chris Cui
Archives
Health
.
Fashion
.
Food
.
Shopping
.
Events
.
Fiction
.
Travel
.
Japan
.
Education
.
Privacy & Cookies: This site uses cookies. By continuing to use this website, you agree to their use.
To find out more, including how to control cookies, see here:
Cookie Policy
Subscribe
Subscribed
C. Cui's Blog
Sign me up
Already have a WordPress.com account?
Log in now.
C. Cui's Blog
Subscribe
Subscribed
Sign up
Log in
Report this content
View site in Reader
Manage subscriptions
Collapse this bar