

2021-Jan-31: The git repo has been upgraded from PyTorch-0.3.0 to PyTorch-1.7.0. with Python=3.8.3.
Continue my last post Image Style Transfer Using ConvNets by TensorFlow (Windows), this article will introduce the Fast Neural Style Transfer by PyTorch on MacOS.
The original program is written in Python, and uses [PyTorch], [SciPy]. A GPU is not necessary but can provide a significant speedup especially for training a new model. Regular sized images can be styled on a laptop or desktop using saved models.
More details about the algorithm could be found in the following papers:


- Perceptual Losses for Real-Time Style Transfer and Super-Resolution (2016).
- Instance Normalization: The Missing Ingredient for Fast Stylization (2017).
If you could not download the papers, here are the Papers.
You can find all the source code and images (updated in 2021) at my GitHub: fast_neural_style .
Notification (31-Jan-2021) : the following sections are the original steps designed in 2017. PyTorch has been upgraded several rounds since that time, so it may looks different to the following contents.
1. Install PyTorch on your Macbook.
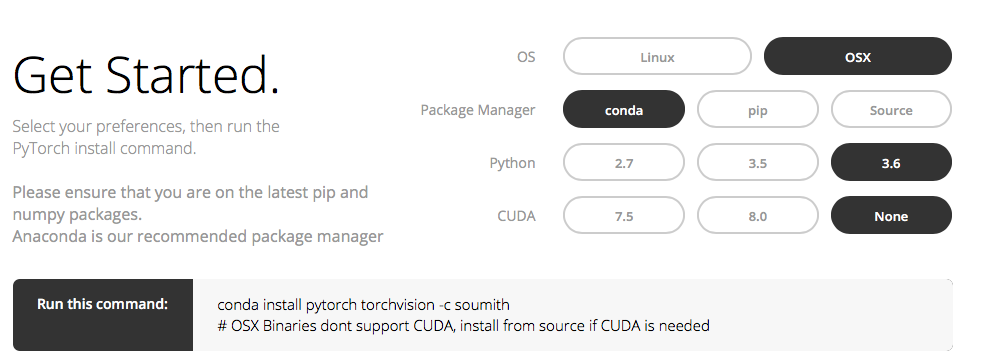
conda install pytorch torchvision -c soumith
I suggest you install PyTorch by conda. If you are capable to compile the source, choose the source. Check your python version before installation. Here I assume you have already know how to use conda to add related packages.
2. Download the project from my repository on GitHub.
Unzip and open the project folder you will the following documents:

The images folder contains the input images and output images and the style images (if you want to train a new model), here I used the trained model in saved models.

## Usage
python neural_style/neural_style.py eval --content-image </path/to/content/image> --model </path/to/saved/model> --output-image </path/to/output/image> --cuda 0
```
* `--content-image`: path to content image you want to stylize.
* `--model`: saved model to be used for stylizing the image (eg: `mosaic.pth`)
* `--output-image`: path for saving the output image.
* `--content-scale`: factor for scaling down the content image if memory is an issue (eg: value of 2 will halve the height and width of content-image)
* `--cuda`: set it to 1 for running on GPU, 0 for CPU.
For example,
python neural_style/neural_style.py eval --content-image images/content-images/latrobe.jpg --model saved_models/udnie.pth --output-image images/output-images/latrobe-udnie.jpg --cuda 0
The Test.sh is written by me. Directly run this bash file in your terminal you will get similar results as follows: (or you can modify this one for your own needs)

Then in the images/output-images, you will get your amazing neural style transferred images.
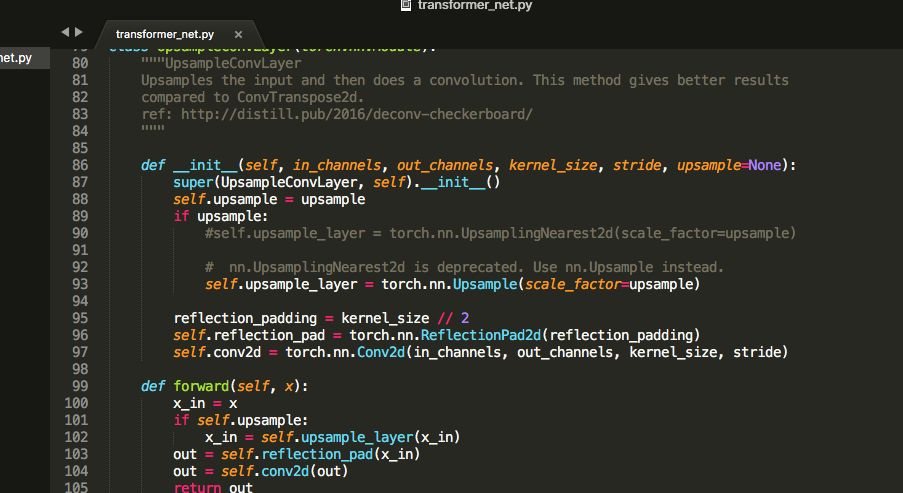
The following capture presents the main difference between the original codes and mine, small modification is applied just to get rid of warnings, like this one:
nn.UpsamplingNearest2d is deprecated. Use nn.Upsample instead.
Here is what I got by using the photo of LIMS building of the La Trobe University, Melbourne, Australia.

content.jpg
Here are the style images and the output images:


Reblogged this on C. Cui's Blog and commented:
2021-Jan-31: The git repo has been upgraded from PyTorch 0.3.0 to PyTorch 1.7.0 with Python 3.8.3.
LikeLike